Bed Post Repair

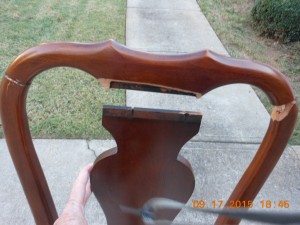
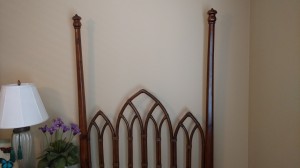
I recently had to repair a broken bed post.  I was sent a blurry picture, with the explanation that “the movers tried to repair it”.

They glued the piece on crooked, and all of the jagged edges were exposed. To top it off they used gorilla glue that seaped out, and made a complete mess.  Of course the customer was not happy with this, so they wanted a pro to come out immediately.  The problem was that the repair was located  near Birmingham, Alabama.  The movers tried in vain to find a local repairman, but they could not find anyone that would go to the customer’s home.

I told them I would do it, but they would have to pay for my travel etc.  I did not want to have to take this one back to the shop, so I made sure to take everything I would need.

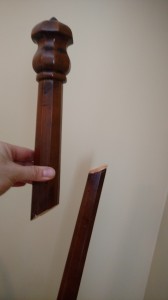
When I got there I realized that the Bed post would have to be cut in 2 where the movers tried to glue it. Also I would have to scrape away the glue mess.  The customer was nervous about this, but seemed satisfied with my answer about how I would repair.

After removing the glue, I went to my truck and got my favorite Japanese saw, and started cutting away….
IMG_20160502_114923416IMG_20160502_114931744

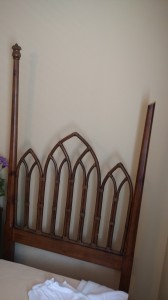
I put a dowel in the middle, and glued the piece that I cut back on to the post. I had to fill, and touch up where the damage was.
IMG_20160502_124032872

It took about and hour to do the repair, and 5 hours of driving!

Zeke Willard
Fairy Wings and a Skate Board

IMG_20160404_094545233

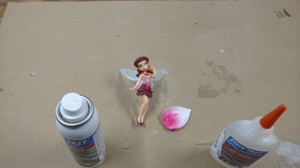
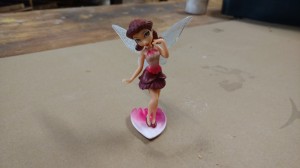
Ruby has been into fairies lately ever since she watched the Tinker Bell movie.   She is very crafty and started to make fairy houses out of cardboard, and even painted some of them.  Her grandma found out, and bought her several toy fairies to fill the houses.  The only problem was that they were plastic.  It seemed like if she moved them, or touched them the wings would break off.

I came home from my appointments for the day, and she ran up to me, and said.

“Daddy can you fix my Fairies? It will be easy all you have to do is glue, and clamp them.”

Whenever something breaks that’s what she says so that I will do it right away.

I told her to leave it on the workbench, and I will take care of it.

IMG_20160404_094427116

I whipped out my overly expensive super glue, which I mainly use for loose veneer, or other small non structural items.  10 seconds later the wings were repaired.

As I went upstairs I could hear her crying, and carrying on.  Another one of her fairy toys were broken! The horror.   I traded it for the fixed one which made her smile, and went down to fix the broken one. For the next two days when I got home I had a broken fairy on my workbench, or on my desk to work on.  I fixed about 5 of them so far, and they  have not broken again yet.

While I was down in the shop working on the 5th fairy Ruby asked, “When are you going to make me a skateboard?’  She was looking at the old busted skateboard I had in the wood pile. I had the idea a year ago to take the wheels off the broken one, and make a new one. I even bought a book about making skateboards. I have been busy and did not think about that until she asked.

I told her I would make one soon. I asked her what color. “I want it pink!”  Victoria hearing us talk about it, said ” I want purple!”.

It has two sides, so as a compromise one side will be pink, and one purple.  The girliest skateboard of all time 🙂

Julien 15 arriving at the time said he wanted to help, so he took off the wheels from the broken one, and I made the new board, and put a paint additive in to make the top non slip.  The result.

IMG_20160401_190839201IMG_20160401_190740254IMG_20160401_190330640

I told Ruby she can put stickers on it if she likes.  She said, “Can you buy me some Fairy Stickers!”

Fort Gordon Repair

Last week I repaired a conference table damage at Fort Gordon in Augusta.  Augusta is about 2 and a half hours from me so it was quite a drive.

It was only a small repair but I was the closest recommended technician according to the designer! He said the guy he uses is in North Carolina.

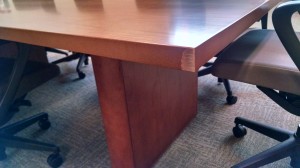
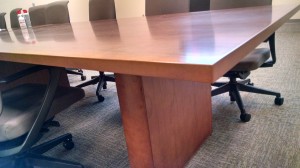
It was a straight forward repair on a cherry table.  I filled and did a touch up on the damage. Took me about 30 min.

Before

IMG_20160311_110017487_HDR

After

IMG_20160311_112339768_HDR

Compared to Fort Benning which I have been to several times, this Army base seemed a little bit smaller but with more security.  I had to go through a background check, and had to provide a valid  license, and social security card to get in.  I had to wait at least 4 days while they did the check.  I did not have to do this at Fort Benning.  They only required me to show my license.

This base had several old baseball fields, and a very large dirt track for lots of running.  I noticed a lot of people there were in civilian clothes.  I did see several new recruits running around, and in place in camouflage, and a backpack, though.  I was recently offered to do a job at a base near New Orleans, but I said I would have to think about it.  I am busy enough  in Georgia!

Zeke Willard

The Nutcracker and Dark Lader

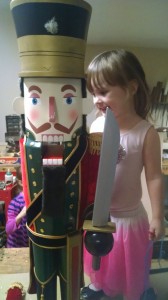
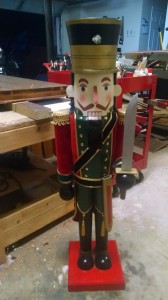
I finally finished the very large Nutcracker.

When I brought this back to my shop I told two of my girls that I had a surprise to show them in the shop.

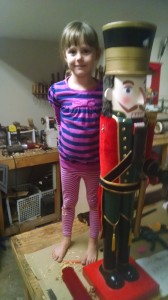
Victoria 3 and Ruby 5 saw right away in the corner of my shop the very large toy figure.  “Wow is  that for me? Can I have it?”

I realized that I should of told them that it was something that I needed to repair for a customer, and not something that would eventually end up in their room!

Victoria 3 started asking me questions.

V, “Is he bad? Is he going to kill someone?”

Me , ” No, he is a toy, why do you ask?”

V, “He has a sword, like a Lightsaber.”

Me, “Don’t worry he has a sword because he is going to protect the good people.”

V, “Ok, I just don’t want him to cut my hand off like Dark Lader!”

Before

IMG_20160112_182159203

Ruby

IMG_20160112_182507620Victoria

The nutcracker had a broken arm, Hilt, damage to his nose, hat, and chest that I needed to repair.  Also the Lightsaber, I mean sword was broken also.

The repair turned out well 🙂

After

IMG_20160202_182927808

Zeke Willard

2015 in Review

IMG_20150102_234425094_HDR

I had a really interesting 2015.  For the past two weeks it has been my goal to clear the shop of all projects that needed to be finished.   The last thing in the shop that has been pressing was an old secretary desk.  I am proud to say that it is finished.

Of course I have a load of new work in my truck to unload today 😉

I had many jobs that tested my skill this year. Some are below:

-Large detailed Doll House.

-Decoy Duck signed by former brave Denny Lemaster

-2 very large carved Griffin Chairs

-A neck on a Peavey Bass guitar

-Made several furniture parts from scratch including a curved bed leg

-Latrine Chair

I also did the 31 day writing challenge. Click here to see all of the links of some of the repairs that I did with pictures.

Some of the woods that I worked on this year were Ebony, Wenge, Teak, Walnut, Cherry, Mahogany, Oak, Pine, Ash, Maple, Birch, and Rosewood.  Mahogany by far was the most popular.

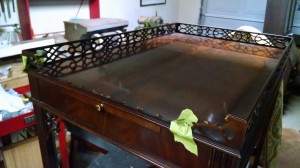
I worked on my fair share of conference tables, desks, and office furniture.  The most work that I had was residential this year though.

It has been an enjoyable year.  Thank you to all of my customers, and for all of the referrals.

“A man who works with his hands is a laborer; a man who works with his hands and his brain is a craftsman; but a man who works with his hands and his brain and his heart is an artist.” Louis Nizer

Thanks,

Zeke Willard

Sometimes it takes many Tools!

IMG_20151207_075433625

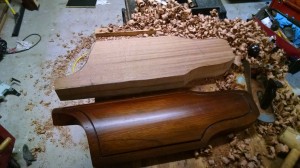
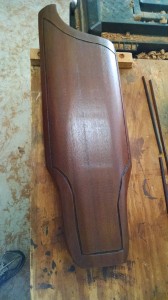
I have been working on a factory made Henredon furniture bed that had an entire leg break off, and get lost during a move.  No one knew what happened to it.  The movers asked if I could make a new one from scratch.

This leg was very curvy, and was hollowed out in the middle.  It also has a decorative routed front.  I know this was going to be a challenge.

IMG_20151207_071816636

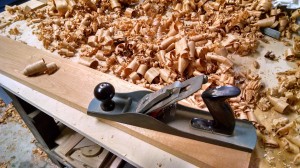
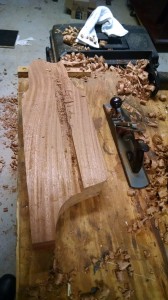
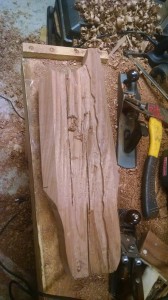
After using my Jigsaw and coping saw to cut out the shape of the leg, I used my #5 Craftsman Jack plane to get it to the right thickness.  I then scored a line across with my tablesaw to the depth that I needed to hollow it out.

IMG_20151208_181309244

Now the fun begins. I got out my hatchet and started hacking away. I used handplanes number 1, 2,4,  5, 33, Round moulding plane, and a round micro rasp to hollow it out, and smooth edges.  I ended up buying a small power plane, and an expensive carving gouge to help with the job. I then used my 2 favorite power sanders to finally get it smoothed out.  I also  used a benchtop power sander. Whew what a job!

IMG_20151212_122428282

After a couple of blisters, and a few splinters I was finished carving it out.

IMG_20151212_124513147_HDR

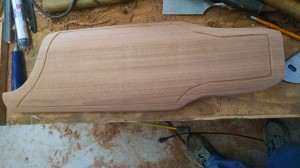
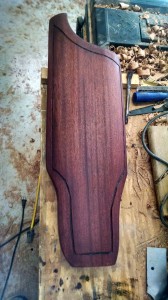
I started the finishing process, and then matched the color.

IMG_20151213_114720502

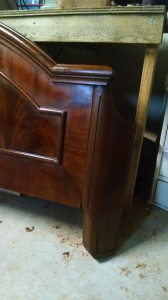
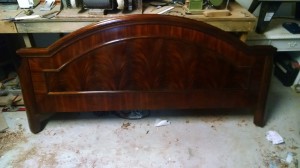
Next I attached it to the Bed Footboard.

IMG_20151214_070736448

I think I used about 20 tools to make this leg. This was a fun challenge, and I am glad that it is finished.

IMG_20151214_070625573

Curvy legs are my specialty 😉

Zeke Willard

The Latrine Chair

IMG_20151028_112124817_HDR (1)

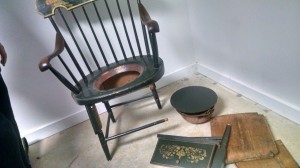
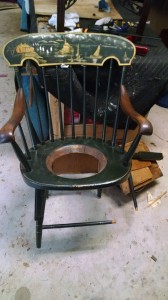
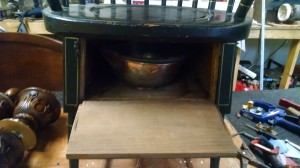
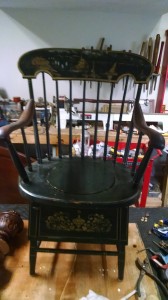
I worked on a broken Latrine Chair for the first time last month.  At least that’s what my customer called it.  It has come to be known as the potty chair in the shop.

I am going to spare you with the potty jokes that were running through my mind while speaking to the customer.   I had to keep a professional demeanor.

More on that later

The customer assured me that the chair would be safe to work on since no one has used it in at least 50 years.  That did not keep me from using gloves while working on the chair :).

IMG_20151102_124908998
According to the customer this is basically what happened. It was shipped from Alabama, and in transit the you know what hit the fan, and it was dropped from a truck.  The terds (according to the customer), aka movers, shrugged their shoulders, and did not know what happened since their supervisor was in a restroom break.  They then gathered all of the broken pieces and dumped the chair in their garage. The customer was very discouraged by this, and said it was making him sick.  So sick that he thought he may have to bow to the porcelain god. I told him that when I am finished he would have a  fancy wooden god to bow to 🙂

Let it be known that I love movers, and I would never refer to them as terds. So this is what I meant that I had to keep my professional demeanor, except I did crack a smile.

Anyway the repair went well and the customer let me know that it is for decoration only, and they will not be using it. Strangely they did have me put it next to their bed.

IMG_20151106_083835959

IMG_20151106_083810761

Sometimes I get all the crappy jobs! 😉
Zeke Willard