Lacquer

2

This is a post in a series of 31 Days of Wood Finishing. See the intro post with all the topics here.


Lacquer became available in the 1920’s.  It was regarded then as the ultimate finish.

Pros of Lacquer:

-It is very fast drying

-It has more water resistance than shellac

-Runs and sags are very much reduced when spraying.

-It can be easily rubbed.

-It has excellent clarity

-Projects can be completed very quickly because of the quick dry time.

-It also can be easily repairable, like shellac

You can spray lacquer, and apply it with a brush.  If you are using padding lacquer you can apply it with a cloth pad.

Cons of Lacquer:

It is a toxic finish, and you need to wear a mask while using it.

-Has a residual smell that can stick around while it is off gassing.

-Has only moderate heat , water, and acid resistance.  So watch out if you leave a hot pizza, or dish on it too long. You will have a nasty white mark to repair.

I use this finish frequently for repairs, and make sure to put on the mask.  It is a beautiful finish, and it is what you see on most furniture today.

Zeke Willard
Sandpaper

2

This is a post in a series of 31 Days of Wood Finishing. See the intro post with all the topics here.

Some people have asked me what the best sandpaper to use is.  There are several brands that you can try.  I have primarily used 3M, and Norton.

3m was my #1 choice for the first several years of my business.   I mainly used 80, 100, 150, 220, 280, 320, and 400 grits in finishing, and repairing furniture.  The lower grits seemed to work very well (80-150).  I always thought there was room for improvement on the higher grits, though (220-400).  They would take a long time to sand as evenly as I would like.

I decided to try Norton sandpaper since the woodworking stores in the area mainly carried that brand.  I was blown away at how much easier it is to sand with the Norton sandpaper.  It seemed like it would last twice as long also.  I have been sanding with Norton for 5 years now.

The  Home Depot in my area recently stopped selling Norton, and has gone back to 3M.  It was advertised as better than ever, and lasts twice as long.  I bought some since I was completely out of the Norton.  While using it, I believe it had the same result. It reminded me how much better Norton was. Also,  you cannot wet sand with the new 3M sandpaper unless it is just water.  I tried wet sanding with Naptha, and the backing of the sandpaper came off in a goo like substance.

Back to Norton! I always tell people Norton is the best.  Hopefully a Norton rep is reading. I could always put their advertising on my blog 😉

Zeke Willard

Your Budding Woodworker continued

2

This is a post in a series of 31 Days of Wood Finishing. See the intro post with all the topics here.

In the previous post I discussed how to encourage children to get into woodworking, safety, and age appropriate tools.

Get Involved

The best way to train your little woodworker is to get in there with them and show them how. Watching you woodworking will inspire your children and give them companionship – something which always makes any job more enjoyable for them. If you don’t know much about woodworking, ask a friend to help out, and stick around and remain available to do any necessary errands for the pair.
Invite Friends

Let your child bring along some friends for a day of woodworking fun. With a group of friends, your child could make plans to build some amazing creations. Each one may want to choose their own project, or perhaps they will get together as a team and make something a little more complex. Either way, they are sure to be left with some great memories.
Woodworking Class

Maybe your best efforts have failed, or you have taken your child as far as you can in woodworking. Look for a local, age-appropriate class that your child can join. A teacher who does this for a living is sure to have many ideas that will stimulate a love of learning for this area in your child. With the creativity, skill, and experience of a professional, your child’s love and interest for their hobby could grow into much more.
Woodworking is a great hobby and can be a lot of fun for a child with an interest in it. If your child has expressed that interest, follow their lead and teach them everything you know. In no time, your budding woodworker will be enjoying much quality time participating in their new skill.
Zeke Willard

Your Budding Woodworker

2
This is a post in a series of 31 Days of Wood Finishing. See the intro post with all the topics here.

The previous post made me think about how you can encourage children to take up the skill/ hobby.
How to Encourage and Support Your Budding Woodworker

Woodworking is a wonderful way to teach children how to be resourceful and creative. It is a skill that a child can be taught from a young age and will come in handy their entire life. There are so many things one can do and build when woodworking. When a child shows interest in this area, a parent should do what they can to encourage them. So how does a parent go about encouraging and supporting their budding woodworker?
Safety First

Although woodworking is a great skill for children to learn, it can be dangerous if not given the respect it deserves. Woodworking involves tools, and needs to be regarded as a serious activity and not one to be taken lightly. Equipment such as table saws, jointers, and band saws can be a huge hazard to anyone not practicing proper safety measures. Treat everything with respect and care.
Age-Appropriate Tools Available

Balance is essential in all things. And along with strict safety guidelines, one should remember that children want to have fun. It is not going to go over well if you don’t allow your children to use any tools at all. There are plenty of tools, when children are supervised, that can bring hours of enjoyment to your budding woodworker. Be sure to make available to your children the tools they are allowed to get their hands on. Let them practice with hand drills, small hammers and the like in order to really feel a part of it all.  I even allow them to use a hand plane, or a small saw with supervision.

To be continued

Zeke Willard

Future Wood Finishing Helpers?

2

This is a post in a series of 31 Days of Wood Finishing. See the intro post with all the topics here.

IMG_20141003_143451235

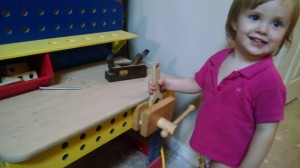
Today I had a couple of helpers in the shop.  Ruby has her own workbench, and sometimes lets Victoria use it (below).

IMG_20141010_211127023

They have a wooden wrench, hammer, and an assortment of wood nuts, and bolts to play with.  I also let them use a hand plane with supervision. I don’t let them stay with me when I am doing finish work.  So they are not exactly wood finishing helpers yet, but maybe when they get older 🙂

Zeke Willard

Padding Lacquer for French Polishing

2

This is a post in a series of 31 Days of Wood Finishing. See the intro post with all the topics here.

Padding lacquer can be used to french polish also.  It can give you the same results as shellac.  It has better resistance to water, and dries very quickly.  It mixes well with dyes, and colored powders.  You can use it to create a custom color, and is good for touch ups.

You make a pad (rubber), just like in french polishing, and apply it the same way with slight differences. No mineral oil is used, and it comes in the bottle ready to use.

The only drawback is that it is very smelly, and you need to wear  a respirator, and have some ventilation.   Padding lacquer is more of a specialized finish for pros.  It takes a little practice to get used to.  I have not seen it at any hardware stores, and you may have to go online to purchase it.  I used this primarily for touch up, and reconditioning work on furniture, but I hardly use it anymore because of the fumes.

Zeke Willard

Wear the Respirator

2

This is a post in a series of 31 Days of Wood Finishing. See the intro post with all the topics here.

Lacquer, and urethanes are very smelly.  They bother me much more than Shellac.  I have made it a point to always wear my respirator when working with these finishes.

I want to encourage you to use your respirator. You may be made fun of, ( I am your father jokes) etc.  Or if you are working in public you may scare people. Hey buddy do you have a mask for me?  Also the respirator is uncomfortable, heavy, and can make some feel claustrophobic.  These are some of the Cons.

There is one Pro. You will live.  So hands down Wear the Respirator. Who cares what people think.  Anyway, Click here for a blog post I wrote in March.  I missed 3 months of work because I did not wear the respirator.

Zeke Willard

French Polishing Continued

2

This is a post in a series of 31 Days of Wood Finishing. See the intro post with all the topics here.

When I French polish I first mix my shellac flakes with denatured alcohol. About 4 oz. of flakes to 1 pt. of denatured alcohol.  This is a good thickness for french polishing.  Leave the flakes immersed in the alcohol overnight.

The next day the finish should be ready.  After shaking it up, you can use a strainer to pour it into a squeeze bottle for easy dispensing.

I then take a wad of cheesecloth, about the size of a golf ball, and wrap it in a piece of T shirt cloth.  Make a tight ball in your hand.  This pad is called a “rubber“.

Soak the rubber in alcohol, and add shellac from your bottle.  The pad should be wet like dog’s nose.

Make sure that you lightly scuff, or sand the piece of wood, and wear your respirator.

I start by going with the grain overlapping, coating the top for the first coat, then I start in with circles, and figure eights.  Whatever feels comfortable.  If the finish starts to stick I add a drop or two of mineral oil.  When the finish is dry the mineral oil will come to the top, and then you have to use a lightly soaked alcohol  rag to wipe it off.  You have to go with the grain to do this, and it is called “spiriting off“.

Don’t stop the rag on the finish it will leave a mark.  Touch down, and lift off.  Think of an airplane.  You continue to polish until the finish looks good to you.  After doing this for a long time you will have a trained eye, and know you are done.

It is best to watch a trained pro do this.  There are also videos you can watch that can help. Youtube comes to mind. This skill takes practice, so don’t give up if you are having trouble.

Zeke Willard

Supply List for French Polishing

2

This is a post in a series of 31 Days of Wood Finishing. See the intro post with all the topics here.

What you need to start French Polishing

Some of the supplies that you need to start french polishing are :

-Shellac Flakes, There are a few to choose from.  Get the blonde dewaxed  flakes to start. If you get the waxed flakes, you can delete the mineral oil from this list.

-Denatured alcohol

-mineral oil

-Container with lid  to mix Shellac, and denatured alcohol, (Can be a mason jar, or plastic container).

-T shirt cloth

-Cheesecloth (optional), but will help to form a ball for the pad.

-Vinyl disposable gloves, or anything besides the powdered latex

-Respirator

-scrap piece of wood to practice on

-320- 400 sandpaper.

-extra fine steel wool

This is it.  You are ready to roll.  In the next post we will start french polishing.

Zeke Willard

French Polishing Intro

2

This is a post in a series of 31 Days of Wood Finishing. See the intro post with all the topics here.

IMG_20140917_152447446

Above is  a table I recently French Polished.

There is a mystique about French Polishing.  Some claim that it is the most beautiful finish ever created.  It has it’s own vocabulary like “Charging the rubber“, or  “spiriting off“.  You touch down, and lift off when you apply it, and even use figure eights.  Maybe it is just the name that makes it sound elegant.

French polishing has a long history.  A lot of antiques have survived hundreds of years because of this polish/ technique.  The name describes the finish, and the technique to apply it.

I use french polishing to renew old, damaged finishes on antiques.

French polishing has a reputation of being difficult to apply, or arcane, but it can get easier with practice (I promise).

In the next article in this series I will discuss how to apply this finish on wood.

Zeke Willard