Heat Marks

2

This is a post in a series of 31 Days of Wood Finishing. See the intro post with all the topics here.

Heat Marks

When I was talking about blushing in the previous post, it reminded me of heat marks.  Heat marks can look the same as blushing.  It will look off-white, and cloudy. The difference is that heat marks will not come out when you use denatured alcohol.

The only way you can repair heat marks is to sand through the cloudy off-white area, and reapply finish.

If the heat mark has bubbled the finish you may have to hum bug on a  little color after you sand the area.  Sometimes heat marks can only be repaired by refinishing the whole top.

Click here for a tip from Charles Neil, a well known wood finisher.  If you try this please have a fire extinguisher handy! I have never tried this one out, but in theory it should work.

Zeke Willard

3 Common Problems When Using Shellac

2

This is a post in a series of 31 Days of Wood Finishing. See the intro post with all the topics here.

Yesterday I did a post on Shellac.  I wanted to mention some of the common problems you may come across when you apply Shellac, and the solutions.

Blushing

Blushing is when part or all of the surface appears cloudy, or off- white in color. This is caused by too much moisture in the air, or some water could have gotten into the shellac.

Sometimes if you let the project cure for an hour or so the blushing will disappear.  This happened when I sprayed shellac for the first time.  I waited a half an hour, and the blushing disappeared.  If it does not go away you can lightly wipe it with some denatured alcohol on a rag.  Another way to remove blushing is to rub the surface with fine abrasives.  I recommend wet sanding so you can see what you are doing, and don’t sand through to the bare wood.  You are only trying to cut through the blush.

Dust or trash in the Finish

The air in the shop, your brush, or your work surface could be dusty.   I call this trash in the finish.

This is easily removed by lightly sanding the affected area, cleaning the area, and reapplying the finish.

Ridges or Orange Peel

Ridges occur when too thick of a coat is applied with a brush.  Looks like a thick line in the finish.  Orange Peel occurs when  too thick of a coat of shellac is sprayed.  It actually looks like the texture on an orange peel.

The way to fix this is to sand the marks out, and add more denatured alcohol to the shellac to thin it.  Then apply thinner coats.

Zeke Willard

Shellac

2

This is a post in a series of 31 Days of Wood Finishing. See the intro post with all the topics here.

Shellac is one of my favorite finishes to use on wood.  It creates a beautiful finish.   I use it to french polish furniture, and for many of the touch ups that I do on wood pieces.

Shellac works very well with dyes, and powders to create a custom color.   I use Bulls Eye de-waxed shellac for my touch ups.  You can apply it with a brush,  a lint free rag ( Old T shirt will work), or you can spray it.

You can fold up a rag into a ball to make a french polishing pad.  I will get more into detail with this in another blog post this week. Also you can apply color with the shellac soaked rag, which is called hum bugging.

Where does Shellac come from?  It comes from a bug! Shellac is a resin secreted by the female lac bug, on trees in the forests of India and Thailand. It is processed and sold as dry flakes, which are dissolved in alcohol to make liquid shellac. The alcohol that is used can be found at any hardware store, and goes by the name Denatured Alcohol.  It is actually just poisoned alcohol to avoid the liquor tax.  You could actually use Jack Daniels whiskey to create an interesting finish.  Don’t ask me how I know 🙂

Shellac should be used for indoor furniture, or woodwork, and in the past has been used on floors.  It is not a water proof finish, so it is not good to use on dining tables, or wood that may meet a lot of water.

A pro for me is that it is easily repairable if something goes wrong.  For example, if I make a mistake while finishing, I don’t have to strip, and refinish the piece again. Also, the finish does not need sanding in between coats.  It absorbs into the other coat.  At the end I do smooth  the finish with abrasives, or wax. Another pro is that it does not smell that bad.  I still use a respirator, but it is not nearly as stinky as lacquer, or urethane.  The dry time is very quick. You can complete a project the same day.  It is also a natural finish, and is not a chemical concoction, so it is safer to use.

Zeke Willard

31 Days of Wood Finishing

2

This month I will be joining a writing challenge created by home blogger, Myquillyn Smith (The Nester).  Every day this month I will be writing on the topic of wood finishing.

I will be providing information about  Shellac, Wax, Lacquer, and Urethane finishes.  I will share where I use these finishes, and how I apply them.

I live in the Atlanta, Ga area, and have been doing furniture repair as a profession for over 15 years.  I am excited about this writing challenge, and I hope you enjoy what I write! If you have any questions, or comments feel free to leave some feedback.

Below are the topics I will be talking about.  Hopefully at the end of the month there  will be 31 posts including the intro!

1.Intro Post (You are here)

2. Shellac

3. 3 common Problems When Using Shellac

4.Heat Marks

5.French Polishing Intro

6.Supply list for French Polishing

7.French Polishing Continued

8.Wear the Respirator

9.Padding Lacquer for French Polishing

10.Future Wood Finishing Helpers?

11.Your Budding Woodworker

12.Your Budding Woodworker continued

13.Sandpaper

14.Lacquer

15.Acrylic Lacquer

16.Wax

17.Danish Oil

18.Metamerism

19. Linseed Oil

button

Zeke Willard

Bullet Hole Repair

I did my first bullet hole damage repair the other day.  The story is that the wife was learning how to hold a hand gun.  It accidently went off, and went through the bedroom wall, through the back of a chest of drawers, and out through one of the drawers! I was given the drawer, by the wife’s personal assistant.  The assistant wanted me to repair it while the husband, and wife were on vacation.  The husband did not know what had happened.  He had a heart condition, so they did not want to upset him.  I told the assistant I could make the damage disappear, and he would never know.

What a scandal!

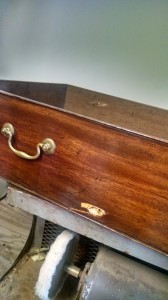
Below is a picture of the damage.

IMG_20140908_174253002_HDR

I took the drawer to my shop, and after removing the splinters, caused by the bullet, I filled, and touched up the damage area. Where the bullet entered there was a perfect hole.

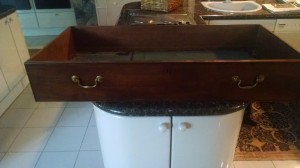
Below is the finished piece

IMG_20140910_143512062

The Personal assistant said, “the husband will never know. ” 🙂

Zeke Willard “Bullet Hole Repair Specialist”

Office Chair Repairs

office-chair

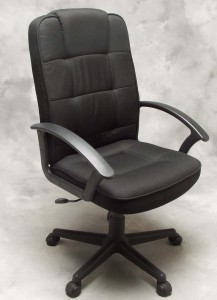
The other day I replaced a gas cylinder on an office chair. This is the part that is between the base, and the seat, and usually has plastic pieces that rise up and down with the chair.

The chair would no longer smoothly rise up when you pulled the lever.  The customer said he did not know who to call to repair the chair.  He said the manufacturer sent out a technician a few years ago to change out a defective cylinder, but the customer did not like who was sent. 

He said, “The tech banged on it with a hammer, like he was mad at an ex wife.”

He said it was making him nervous, hearing, and seeing his new office chair being manhandled.  I told him I use a different technique to remove the cylinder.  The cylinder can be difficult to remove.

All I needed was a pipe wrench, a hammer (to lightly tap), and some WD 40.

The customer was pleased that the chair was repaired, and happy I did not beat on it to fix it.

We replace broken caster/wheels, arm rests, gas cylinders on office chairs.  Please call, or email for a quote.

Zeke Willard

4048031093

zekewillard@gmail.com

Hardwood Floor damage

Do you repair wood floors?

IMG_20140725_120815816

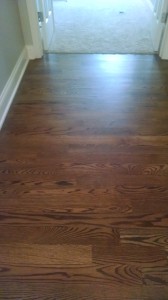
This is a question that I have received from my clients.  The answer is yes, but I do not sand down floors, and do a full refinish.  I can repair minor scratches, gouges, and dents in hardwoods using a specialized technique.  I only repair the spot where the damage occurs.  Doing a full refinish is a very, dusty, and smelly endeavor.  I try to prevent that.

I did not originally do hardwood floor repairs when I started my business.  It started when I was asked by a moving company to help with a wood floor emergency.  A chandelier was hit by a bed frame going up a flight of stairs, and it fell and put a gouge in the wood floor.  When I got to the customer’s home a glass chandelier piece was sticking in the hardwood floor!  I had to dig it out, and fill the damage, and stain to match. Turned out great, and I have done hundreds of floor repairs since.  If you are in doubt if I can repair the damage to your floor, send me a picture.  I can usually determine if I am the right person for the job.

Send pictures to zekewillard@gmail.com

Zeke Willard

Step away from the Gorilla Glue!

You can find Gorilla glue in most hardware stores.  Just the name of it sounds strong, so a lot of people buy it.  Gorilla glue is a good product, and works well if you know how to use it.  What people don’t realize is that when the glue cures it foams, and expands.

In the wrong hands, an easy glue up can become a foaming mess.

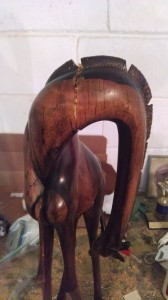
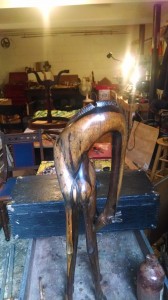
I have had to repair numerous items where gorilla glue was originally used.  I usually have to chisel away all of the expanded glue, and repair where the damage occurred.   If the broken piece was not glued properly, I may even have to re-break it, and start again.  This means I have to scrape away all of the gorilla glue.  This is a time consuming process.  If you do use Gorilla glue just make sure to read the instructions, because it is different than old wood glue. Below is an ebony hand carved giraffe from Africa. It was repaired with Gorilla glue by a customer. I had to carve and scrape all of the expanded glue off, and then I was able to fill and touch up the damage.  It would have been an easy repair for me, if Gorilla glue was not used. The picture below is after I scraped away all of the glue.

Before

IMG_20140618_140651813

After

IMG_20140627_080309727

Please step away from the Gorilla Glue!

Zeke Willard

Baby Crib damage

I have had a couple calls recently for baby cribs.

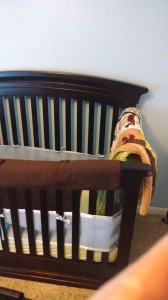
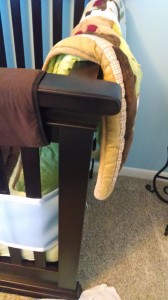
One was damaged in a recent move, and had a large gouge in it, and paint marks from moving it through a door frame.  The customer told me it had to be perfect, or the movers would have to buy her a new one. She said her son has not even slept in it yet.  I told her I would do my best :).  When I was finished she could not find the damage, and asked ” Will it stay that way?”.  I kindly explained that it was dry, and would be durable.

Before

IMG_20140627_113602930

After

IMG_20140627_114609111

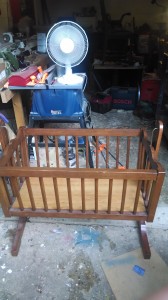
The other was hand made in the 50’s and was not swinging properly.  This piece is held together with 2 wedges that keep the bottom, and top together.  The holes the wedges go into widened, so I had to make 2 new bigger wedges.  The fix worked, and all of the joints were tight.  The crib swung like it should.  I was told that 3 babies in the family have used this crib, and now it was getting ready for the 4th.  I love my job!

IMG_20140627_085146827

Zeke Willard

Do you repair antique furniture?

I get this question a lot.

I went out to a new customer’s home recently, and she said.  “You look too young to repair antiques.  I was expecting an old man in his sixties to show up!”  After telling her how I would repair the broken furniture, she was at ease, and allowed me to work on her broken pieces. She wanted to make sure that real wood would be used, and not any putty filler.

I have worked on several antiques during my 15 years of doing furniture repair work.  I had a job a couple of years ago, that required repair, touch up, and polishing to nearly 100 pieces of antique furniture for a company in downtown Atlanta.  I since have gone back when they recently moved, and did minor touch ups to the same pieces.

The truth is, I enjoy working on the older pieces.  Most of them respond to my repair finishes very well, and when a piece of wood needs to be inlaid, hand planes can be used.  I don’t have to worry about cutting into the dreaded particle board either!  A lot of times I am correcting amateur repairs.  A nail put here, or gorilla glue put there, or even square head screws used to replace standard. The Horror!

I may not be sixty yet, but I have put a lot of time learning about antique furniture repair methods.  I have attended classes, read books, and even watched videos.  I have also had a lot of practice!  So be assured that I can help you with your antique heirloom.

I do like what another customer said recently, when I arrived at her home.  ” It is so nice to see a young man in this trade.”  I thanked her, and took her chair to repair a spindle.  As I was leaving she said, “Make sure to spin me a new spindle, I don’t want any wood putty on it”.  Gotta love my job.

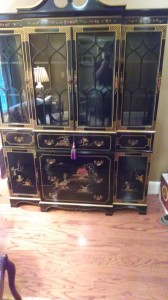
Below is an antique I recently worked on.  I had to extend the feet on it.  New hardwood flooring was installed, and the piece was dangerously leaning forward.  When I put the new feet on, (which I made in my shop), it was level.   I had to match the color, and blend in any lines so it looked good.  The customer was satisfied!
IMG_20140611_101620387