The Doll House

IMG_20150115_151043159_HDR

IMG_20150115_151057323

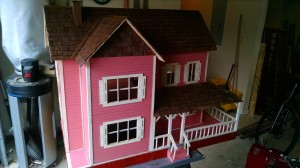
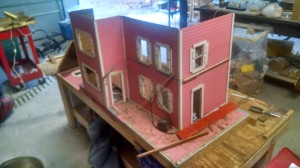
We recently finished a very large dollhouse that most likely came from a do it yourself kit from the 1940’s.

We were commissioned to rebuild it, and replace any missing wood parts.  This dollhouse has the ability to be hooked up with electricity, and had real carpet, and hardwood floors.

When the customer first dropped it off, I did not really know what I was getting into.  The dollhouse had hundreds of small pieces, and it was in very poor shape.  Many of the pieces were broken, and did not fit back properly.  She gave me a very long time to repair it, but I kept on putting it off for other items that would come into the shop. Maybe I should work on better habits?

Long story short, I was embarrassed at how long this took to repair.

I called the customer, and told them that I could not repair it in the time period they gave me, and gave them the option to take it back. They said that they could not find anyone else to work on it, and asked if it could be finished by March 5th.  At the time that was 2 months away.  I started to work on it slowly, but realized that I needed some help.

I decided to give my helper monkey (aka Caleb) his first well paid assignment.

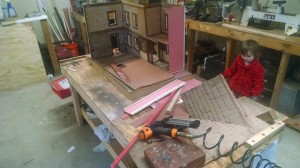
He found the original instructions, and told me he needed a glue gun, lots of glue sticks, and a 1/8 inch chisel to get old glue out of all the cracks.

He worked on it non stop for about 2 weeks. Every day I would check the progress, and I was impressed with the detail he was putting into it.  He had to make parts on the band saw, and also got to use his dove tail saw he purchased. So he said he enjoyed that part. At times it would frustrate him, but he did not give up.

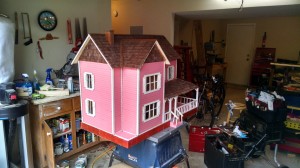
Finally after being the shops longest resident ever, the dollhouse was complete.

I finished it off by touching it up, filling a few damaged areas, and polished the hardwood floors, and wood areas. That was very minor compared to what my helper monkey did.

Don’t tell him, but I think he has a talent for woodworking, and this will not be his last assignment :).

.
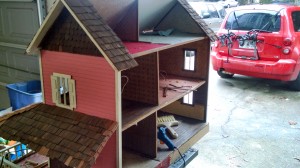
IMG_20150302_090940707_HDR

Below are the results, and the customer thanked me for the work.
IMG_20150303_112403372_HDRIMG_20150303_112412592

Musical Instruments

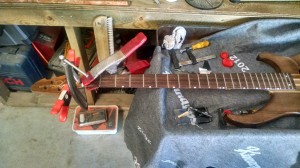
I repaired a Bass Guitar recently in my shop.  I have only repaired a few musical instruments since I started my business. I have done a couple of burn in repairs on Acoustic guitars, and I have done several repairs to Pianos.  I touched up a damaged organ before also.  These were mostly cosmetic repairs.

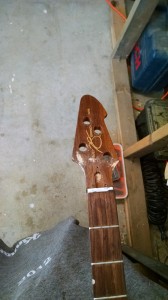
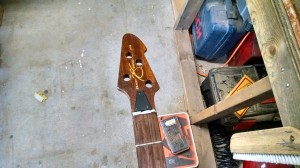
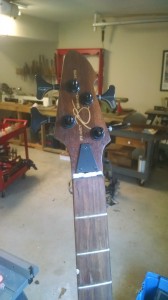
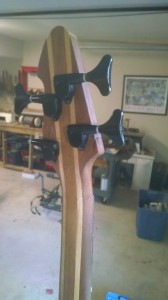
The Bass guitar was a different story.  The Peg head was completely broken off of the neck.

IMG_20150206_103113360_HDRIMG_20150208_143510786

I am not a luthier, but my oldest son Caleb is studying to be a luthier, and has made an electric guitar from scratch.  He took off all of the strings, and pegs, and other hardware.  Caleb found out the best way to repair the Bass to give it strength.  I did the repair.   After gluing it up I had to match the different colors of the wood. The P for Peavey was completely missing because of the break. I had to paint the P in with gold gilding powder. Caleb then put on all of the required hardware.

IMG_20150210_100446947_HDRIMG_20150212_080714505IMG_20150212_080723890

It turned out great, and the customer was satisfied.

Zeke Willard

Interesting Jobs

IMG_20141205_165008099

Lately I have been doing several interesting projects.  I worked on a Carved King/ Griffin Chair, a ceramic top to a large Chinese Vase, and also an antique Carousel Horse.  I worked on Laminate bookcases in a new Library where I had to match Yellow, Light green, and Dark blue colors.

IMG_20141222_091509081

Currently I am refurbishing an antique dollhouse, and I just got a Mirror with a Ceramic Moose on it!  It has a broken antler.  I have 3 works of art in the shop. The gold gilded frames are broken and need repair.  I also repaired a mother of pearl inlay that was missing on a pool table. These jobs have been coming back to back since December.

Normally I see desks, chairs, beds, nightstands, Tables, Armoires, you name it.  So this has been interesting, and has tested my skills.  I have had to take out my art palate, and mix, and match.

Zeke Willard

The Magician

It is a beautiful sunny day, I am in a really good spirits.  I just completed two small jobs.  Both customers told me. ” I don’t see how you can repair that” , and ” You look too young to do this kind of work.” One of the customer’s said, ” I was expecting an old man like myself.”  In both instances I kindly smiled, and told them what I can do.  I told them, give it a chance, if you are not happy you can always complain to the moving company.  And by the way I am pushing 40! Both customers were satisfied with the repairs, and wished me well.

So I was on to my final job of the day.  As soon as I got there, I could tell the customer was not in a good mood.  She had a frown on her face, and huffed when I opened the door. I thought, here we go again.  I looked at the minor damage on her coffee table.  It only had a little color missing on the edge.  She said, without too much enthusiasm, ” Is your repair going to make my table look worse?”

I have heard this before, and I have always thought it was an odd question.  I looked her straight in the eye, and told her, “When I do a repair, it will only look better.”  She stared at me for what seemed a minute, and said go ahead, and do your magic.  After 15 min of intensive labor 😉 , the scratch, and the table was finished.

When she returned she looked at the table, and asked where  the damage is.  That is always a good sign.  I said a Magician never gives away his tricks. All of a sudden her frown disappeared.  Gotta love my job.

IMG_20141222_143526499

Zeke Willard

The King Chair

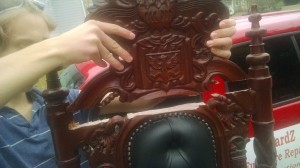
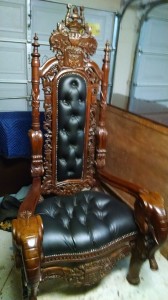
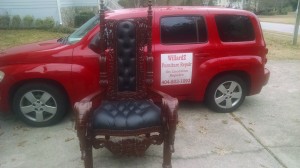
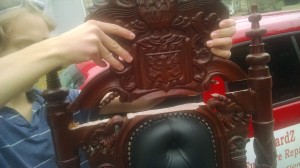
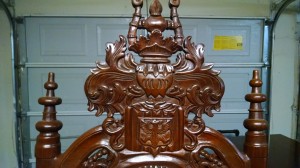
Last week a mover that I work with said they damaged a King Chair, and said they would drop it off.  I did not know what to expect.  When I got back to the shop I was surprised how large the chair was.  It took two of us to move it into the shop.  Notice the top was broken off.

IMG_20141205_164917815

IMG_20141205_165008099

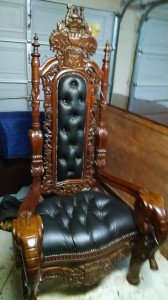
I was not sure what it was called until I loaded a picture of it on facebook.  My brother commented right away.  “Cool Griffin Chair.”  I looked it up, and indeed it was a Griffin Chair.  This is the first time that I had the pleasure to work on one.  It is solid Mahogany throughout, and was hand carved.  It had a leather seat, also.  I looked at similar chairs online, and it is probably worth about $5,000.00.

I had to glue the top back on, and had to restore a lot of the carved pieces that were broken/ missing.  I enjoyed working on this chair.  I asked my wife if I could move it into the living room for a while.   She kindly said NO!  Oh well, I had the thought of sitting on the chair, drinking some cold ale, while thinking about what chores I could assign the kids. Anyway below is the result!

IMG_20141222_091509081

IMG_20141222_091523620

Zeke Willard

Linseed Oil

2

Every once in a while a customer will ask me if I use Linseed Oil to finish antiques.

What is Linseed Oil?

Linseed oil, also known as flax seed oil is a colorless to yellowish oil obtained from the dried, ripened seeds of the flax plant.

Eighteenth century craftsman used it for finishing.  We have all seen how good craftsmanship could be back then. So, it is understandable that people today would think Linseed Oil would be a good choice for finishing.

From what I have read, Linseed Oil is not a durable finish.  It is too thin, and soft to protect against heat, stains or wear. It also takes weeks, or months to fully cure.

The truth is craftsman in the Eighteenth century only used it when there was no other alternative.

I don’t use Linseed oil, there are too many better alternatives.

Zeke Willard
button

Metamerism

2

This is a post in a series of 31 Days of Wood Finishing. See the intro post with all the topics here.


Metamerism is the phenomenon exhibited by a pair of colors that match under one set of lighting conditions, but not under a different set.

Let’s say that I finish a piece of furniture at my shop.  When it is finished it may look exactly like the color sample that was provided.  However, when it is delivered to the customer’s home, they may have different lighting.  The furniture piece may look lighter, or even darker than expected

I have noticed this at customer’s homes.  If the piece is next to a window with the sun shining on one side, it will look lighter than the other side.

If the customer has spotlights above the piece of furniture this can make the color look different also.

After I do a repair that is invisible, I have had some customers pull out the bright flashlights to make sure the repair is perfect.  This is annoying because the repair has to be colored differently according to the light it is in.

Anyway, metamerism is a word that has stuck with me after reading about it several years ago.  And every once in a while a customer pulls out the spotlights, and I have to explain about this phenomenon.
Zeke Willard
button

Danish Oil

2

This is a post in a series of 31 Days of Wood Finishing. See the intro post with all the topics here.

Danish oil is one of my favorite varnish blends.

I use it to polish bases of furniture, antiques, and on newly made pieces. You wipe it on with a cloth, and wait a few minutes, then wipe off the excess.

Danish oil has a satin sheen, and it does take a long time to cure. Usually by the next day it is dry, and able to be handled.   It does have a smell to it, and will continue to smell until it is dry. Most do not use a respirator to apply it, but I do. It gives me a headache, if I am applying the finish to several pieces.

You can get it in a variety of colors, so make sure to get a color close to what you want.

For example if it is an old walnut antique, get light, medium, or dark walnut. There is not much water resistance in this finish, so it is best not to put it on a dining table top. Also make sure to wipe off the excess, otherwise it will get soft, and gummy.

Click below to get some Danish Oil! Zeke Willard

Wax

2

This is a post in a series of 31 Days of Wood Finishing. See the intro post with all the topics here.

IMG_20140927_142744071_HDR

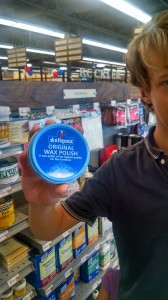
I use wax as a final coat when I apply Shellac, or lacquer. It helps to smooth the finish, and helps to give it more of a defense against scratches, water, and heat.   Wax also helps to blend repairs, as a final finish.

The best wax to use has carnauba wax in it.

Carnauba wax is very hard, and comes from the leaves of a Brazilian palm tree.

Usually the wax I use has solvents added to it, and also softer waxes so that it buffs out easier.

Some of the waxes that I recommend are Renaissance wax, and Antiquax.  Both are expensive but work very well.

I also use tinted BriWax to help hide scratches, or refresh a furniture piece. It does smear if you leave too much on though.

Wax is pretty easy to work with.  You just apply it, and wait a minute, and buff it out.
Zeke Willard

Acrylic Lacquer

2
This is a post in a series of 31 Days of Wood Finishing. See the intro post with all the topics here.

button

Is Acrylic Lacquer the best lacquer to use on wood?  This is what a customer asked me.  I have never used it so I had to do some research.

Some believe that the best lacquer to use is acrylic lacquer. This is what is used on automobiles, and it is harder.

It is not the best lacquer to use on furniture, or wood though.  Acrylic lacquer is not flexible enough.   Wood actually moves, and if acrylic lacquer is used, it could cause cracking in the finish.

So unless you are in the car painting business, it is best to use lacquer formulated for wood!

Zeke Willard